Adding Warehouse Products & Linking Vendors
Overview
In this guide we will go over the following:
Adding products to the warehouse
Linking vendors to products
Updating and accessing vendor information
Who Can Add Warehouse Products?
Users with the “Administrate Legrande System” permission can do anything in the warehouse system. By default, the following user roles have that permission turned on:
- Admin
Adding Products to the Warehouse & Linking Vendors
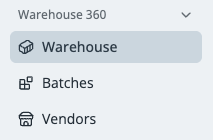
1. Click “Warehouse 360” > “Warehouse” in the blue side navbar
2. Add Current Products in the Warehouse
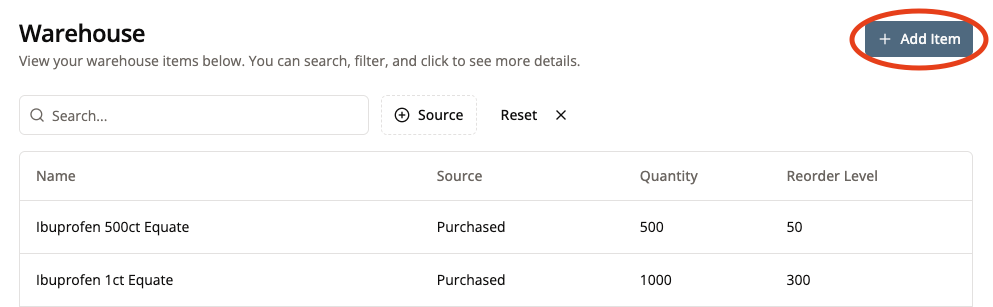
When you click on “Warehouse,” you’ll be able to view all products currently listed in the Warehouse and their current inventories. You can also search for current products in the search bar.
If your item is not listed in the Warehouse already, click “+ Add Item.”
Products cannot be added to the Warehouse here until they are added in Legrande’s Product Catalog and linked to the entity that fulfills that product.
The product catalog is the responsibiility of the practice success team. Please reach out to them if you want a product added.
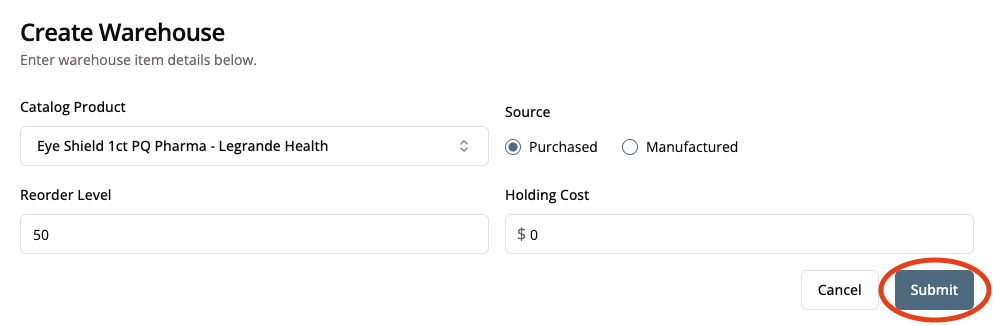
3. Create Product
First, select a product from the drop down menu. For this tutorial, we will look at Eye Shields.

If your product is not in the drop down menu, it means it has not been added in Legrande’s Product Catalog and linked to the manufacturer that fulfills that product.
The product catalog is the responsibiility of the practice success team. Please reach out to them if you need a product added.
4. Determine Source Type
From here, you need to indicate if a product is purchased or manufactured. This impacts how inventory is updated in the system.
In our example, eye shields are a purchased item.

Purchased products are products that the fulfillment team purchases. Some examples include:
Artificial Tears
Eyelid Wipes
Polyurethane Bags
Eye Shields
Manufactured products are products that the fulfillment teams creates out of purchased products.
Some examples include:
Bagged Tears (Made up of Artificial Tears + Polyurethane Bag)
Two-Eye Cataract Kit (Made up on Artificial Tears + Eyelid Wipes)
Shield and Tape (Made up of Eye Shield + Medical Tape + Polyurethane Bag)
5. Fill out Reorder Level and Holding Cost
Once you have filled out these sections, click “Submit.”
Reorder level is the point at which Legrande would need to order more of this product to avoid running out of stock.
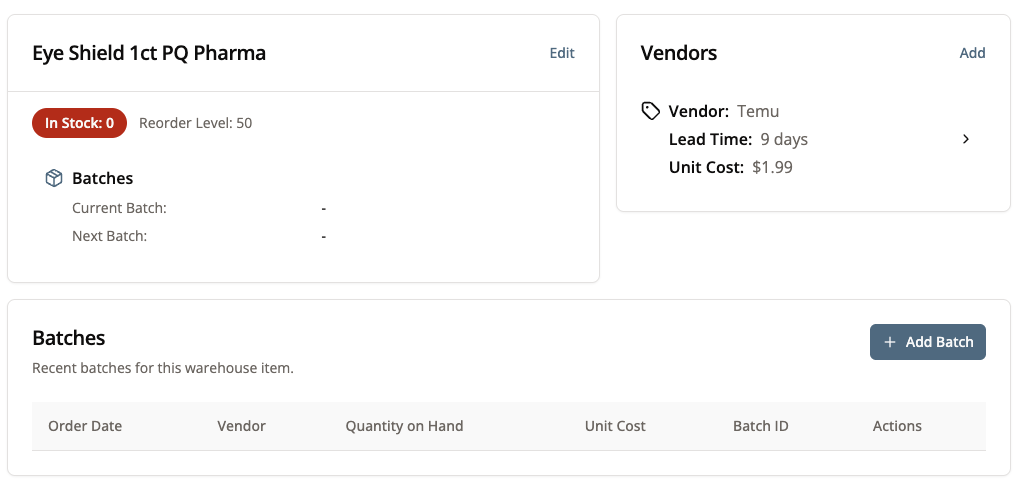
For the example of our eye shields, we’re going to say that when there are 50 eye shields left, Legrande needs to order more to avoid running out of stock.

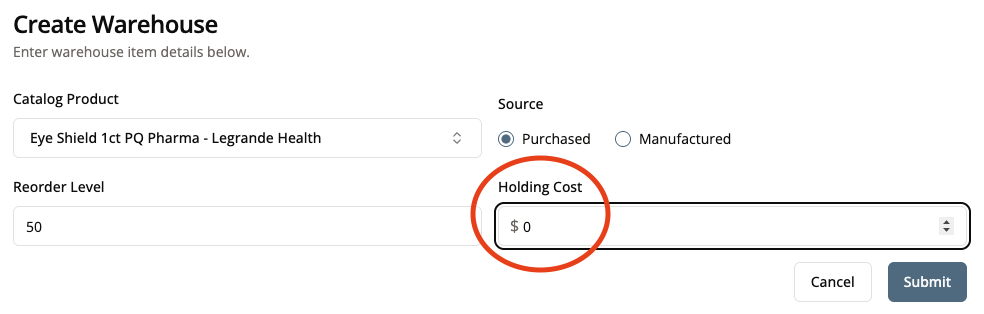
Holding cost indicates how much money it costs Legrande to store this product in the warehouse.
For now, this field will be marked as $0 (until Legrande is ready to start tracking this data).
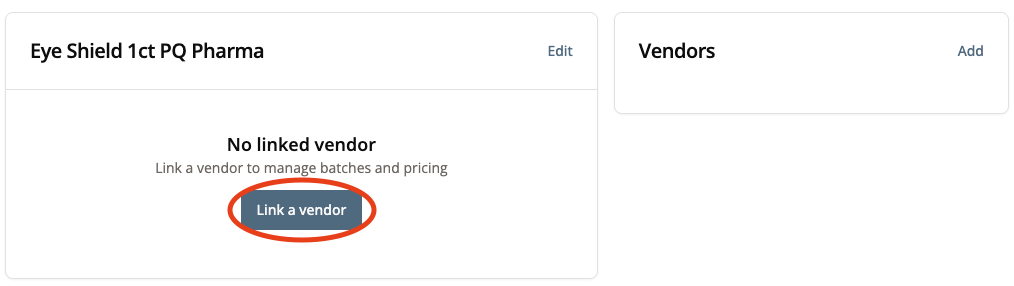
6. Link a Vendor
In order for a product’s inventory to be updated, it needs to be linked to a vendor that sells that product (NOTE: A product can be sold by multiple vendors).
Click “Link a vendor” to add vendor information.
7. Fill Out Vendor Information
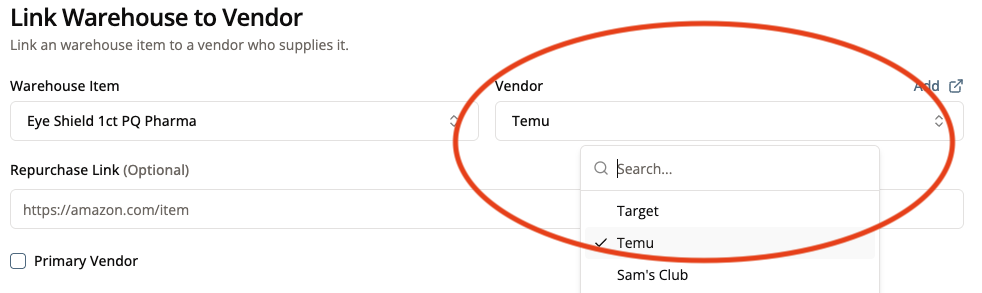
Select the vendor who supplies this product from the drop down menu.
If you have it, include the repurchase link for this item to assist in future purchases.
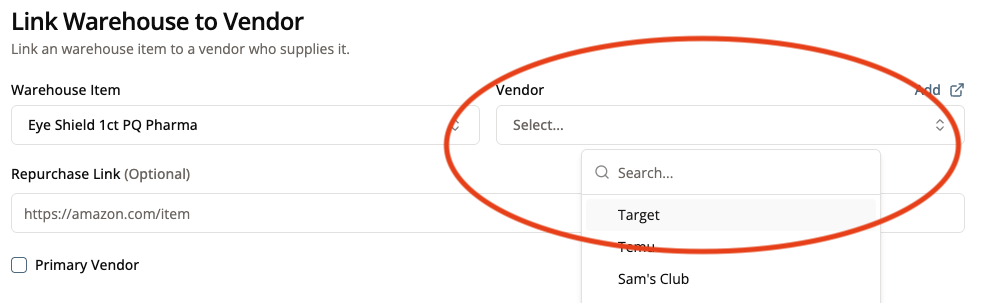
If your Vendor isn’t yet in the drop down menu, click “Add.”
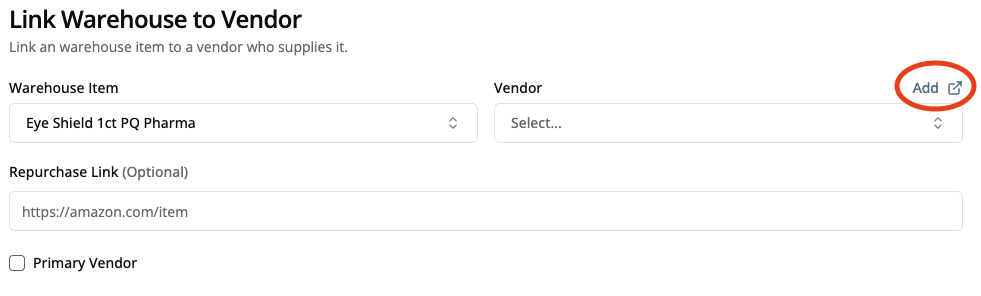
This will open a new tab for you to fill out vendor information. Select the entity that will manage the inventory for this product.
This will almost always be Legrande Health.
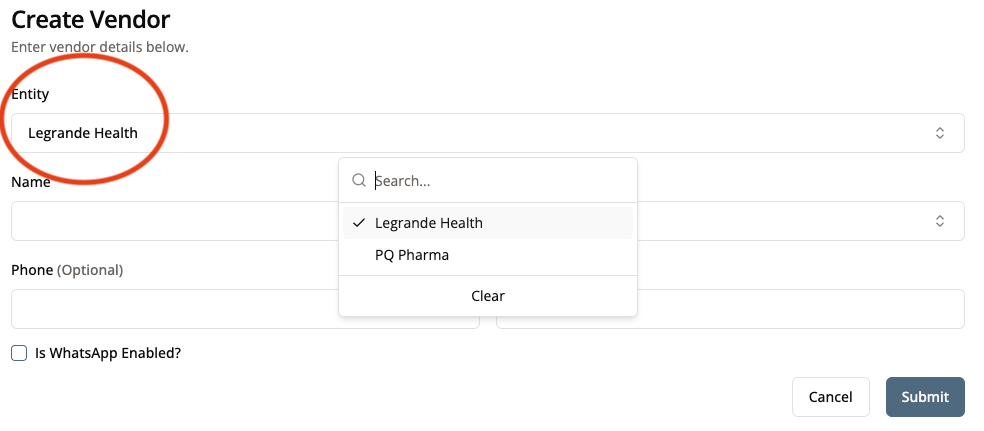
Indicate the name of the Vendor and the country they are operating/shipping out of. For our example, we are buying from Temu, and they operate and ship out of China.
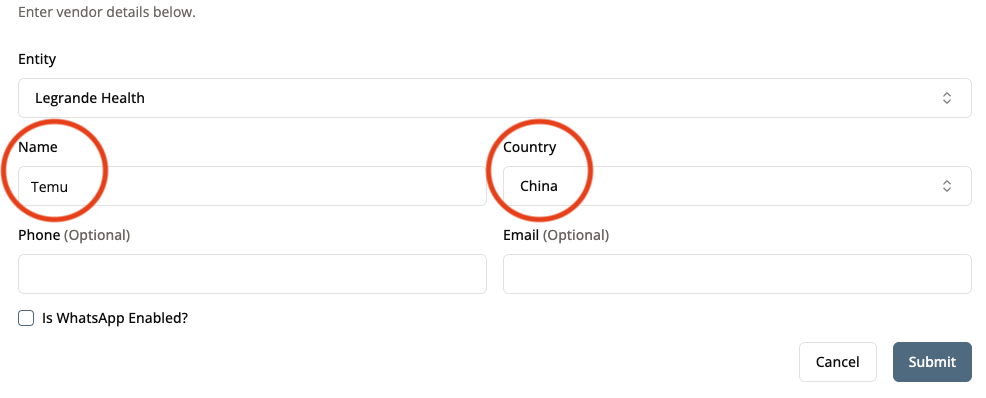
Fill out other pertinent information in the listed fields before clicking “Submit.”
Once you have clicked “Submit,” you can exit this tab and continue filling out the tab you were on previously. The Vendor you have just added will now show up on the drop down menu of vendors.
For my example, Temu is now available to select as my vendor.
Selecting this box will make this vendor the default vendor when purchasing this product.
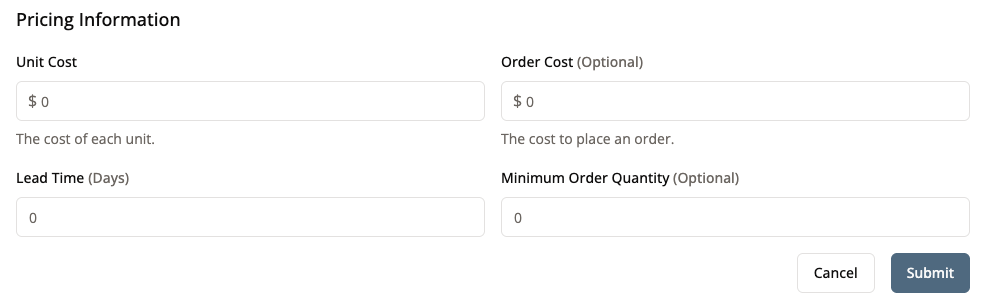
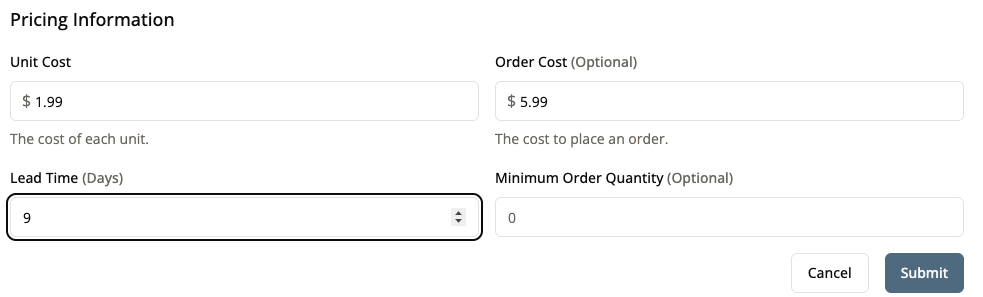
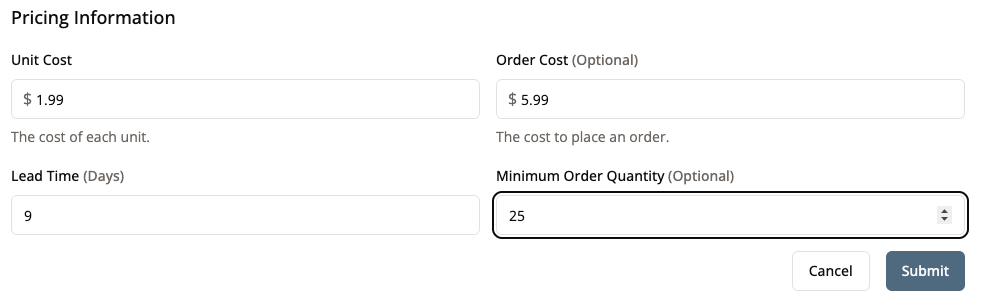
8. Fill Out Pricing Information and Submit
Once you have filled out these fields, click “Submit.”
Unit cost is how much each individual unit of a product costs. For example, one eye shield may cost $1.99 from this vendor.
Unit cost will be automatically updated each time more of this product is ordered.

Some companies charge a flat rate fee to order from them. If the company charges a certain fee with each order, indicate it here.
For our example with Temu, let’s say they charge a flat rate of $5.99 regardless of how much we order from them.
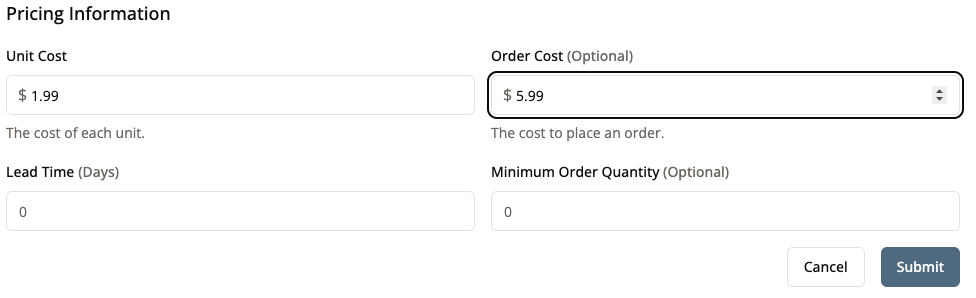
Lead time is how much time it takes for the product to arrive at Legrande after ordering. This helps Legrande to know when to order new product to avoid running out of stock.
For our example with Temu, let’s say it takes 9 days for products ordered from them to arrive at Legrande.
Some vendors will not sell certain products unless a minimum amount is ordered. If the vendor does not require a minimum quantity, mark 0.
For our example with Temu, let’s say they won’t sell less than 25 eye shields at a time, so we need to order at least 25 when we do order them next.
Once you click “Submit,” you’ll be taken to view the product page in the warehouse, and can start updating inventory for this product.
Conclusion
If all went according to plan, you have now listed a product in the Warehouse and have linked a vendor to it. Congratulations!
Next Steps
Now that you have added a product to the Warehouse, it’s time to update its inventory in this tutorial.